

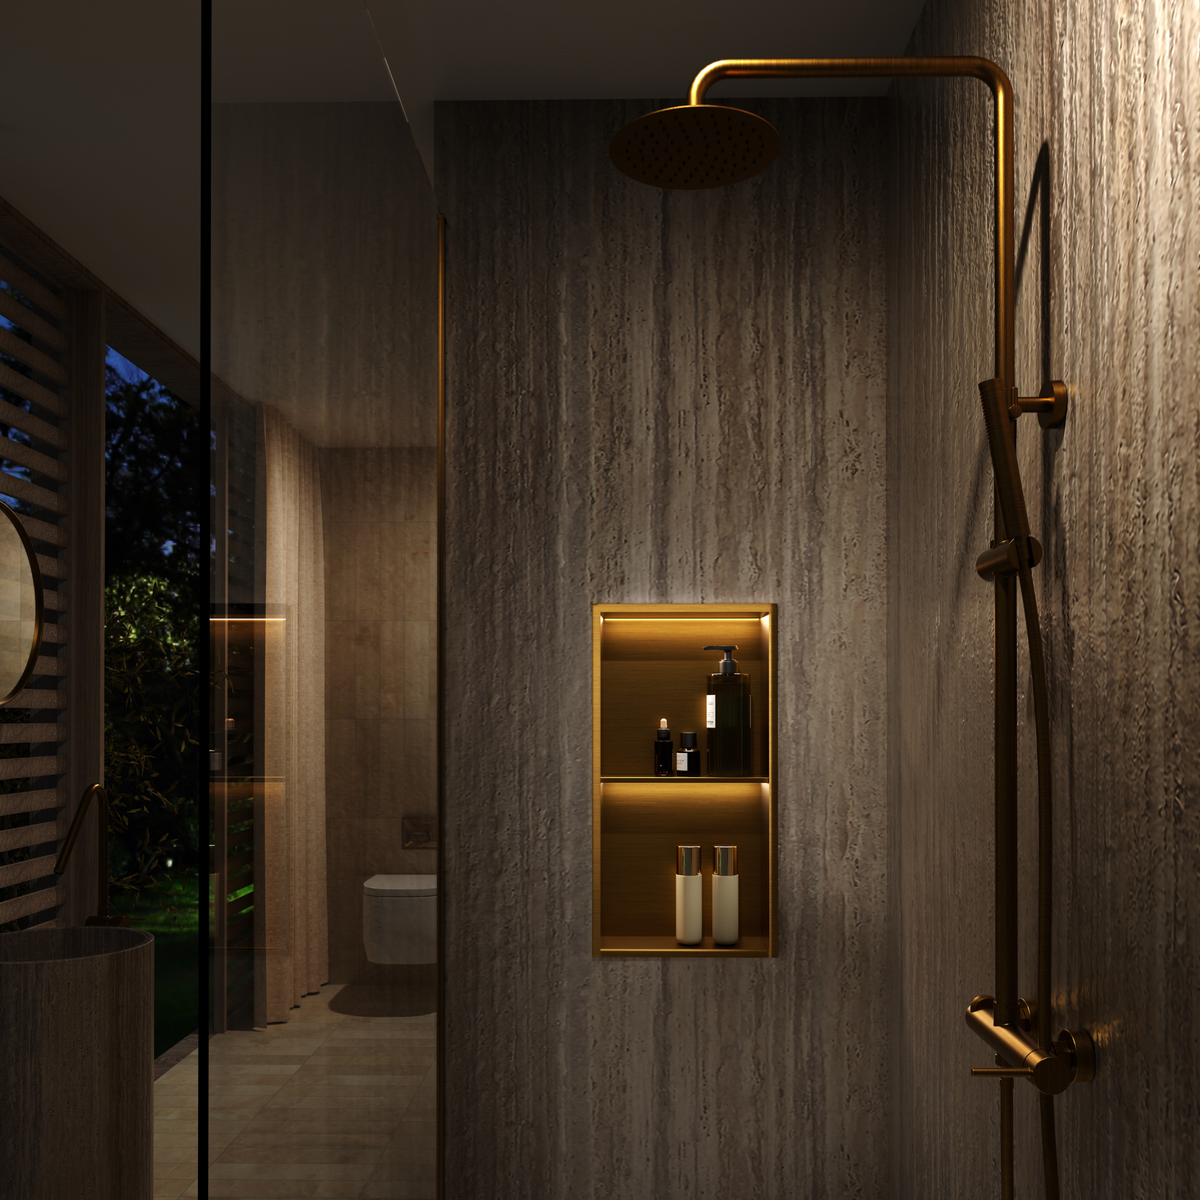
If you are renovating the bathroom or building the shower from scratch, there is a decision that is made long before choosing the shower enclosure or the taps: where the shower niche goes. It is one of those items of work that, if not planned in time, then has no solution without breaking the tiling. Here we explain what exactly it is, why its installation is linked to the construction phase and cannot be added later, how to choose the size and orientation according to the wall opening you have, and what finishes exist for the perimeter frame.
Quick answer
A shower niche is a niche built into the shower wall to store gels, shampoos and accessories without shelves or hanging baskets. It is installed during tiling, fitted between studs or in the available partition space, and is waterproofed as another surface of the shower tray. The size and orientation (horizontal or vertical) are chosen according to the usable width of the wall, not the other way around.
In this article
What is a shower niche and what problem does it solve?
A built-in shower niche is, in essence, a metal box that is recessed into the thickness of the shower wall to create a storage space. Inside, its walls are covered with the same finish that you choose for the frame (nickel, gold, matt black...) and on the outside it is flush with the tiling, integrated as another element of the wall. The result is a small shelf closed on three sides that can hold gels, shampoos, razors or sponges without having to hang mesh baskets or screw shelves to the tiles.
Compared to the solutions that are added after finishing the work - suction cup shelves, baskets hanging from the shower head, screwed shelves - the shower niche does not protrude from the wall, does not accumulate limescale on exposed metal supports and does not depend on a fixation that can loosen over time due to humidity. Being flush, it also makes cleaning easier: there are no protruding corners or extra silicone gaskets around a screwed fitting.
It is, therefore, a design and functionality decision that is made at the same time as deciding the rest of the shower: size of the shower enclosure, location of the taps and position of the drain. It is not an accessory that is purchased at the end to "finish off" the bathroom, but rather a piece that conditions—and is conditioned by—the distribution of the tiling.
Product description, NOLUXA catalogue.
Why it is installed during building work
The shower niche shares a characteristic with the built-in taps: both need to be anchored within the thickness of the wall before the partition is closed and the tiling is placed. It is not a question of aesthetic preference, but of constructive sequence. Once the wall is plastered, waterproofed and tiled, opening a hole to fit the shower niche involves chipping tile, checking the damaged waterproofing and re-tiling the affected area, with the risk that the new tiling will not match the existing one if time has passed since the original installation.
The usual process, coordinated with the installer or tiler, follows this order: first the position of the hole in the partition is defined (normally between studs, in new construction, or by opening the necessary hole in an existing partition during a comprehensive renovation); Then the shower niche box is fitted and fixed; Next, waterproofing is applied to the entire surface of the shower, including the interior and perimeter of the shower niche as if it were a surface more subject to splashes and constant humidity; and only at the end is it finished with tiling, leaving the exterior frame of the shower niche visible in the chosen finish.
Skipping or reversing any of these steps—for example, tiling first and trying to fit the shower niche later—is not feasible with a built-in piece of work. That is why it is advisable to decide on the shower niche in the same meeting in which the built-in taps or the drain are defined: it is one more item in the shower project, not a last-minute accessory.
Important
The shower niche must be decided and fitted before tiling. The space where it is installed must be properly waterproofed—just like the rest of the shower tray—before placing the tile, because it is an area continuously exposed to water. If you have doubts about the sequence of work in your specific case, discuss it with your installer before closing the order for materials.
Choosing a size for your wall
The starting point is not "which shower niche I like", but how much wall space you actually have available to embed it. Before choosing a model, it is advisable to measure the useful width of the wall panel where you want to place it, discounting the minimum distance that must remain to the corners, to the taps and to the floor or the edge of the shower tray. This measurement is what determines whether the space accepts a square shower niche, a wide rectangular one or a tall rectangular one, and also whether a single piece fits or if it is convenient to divide the storage into two smaller spaces at different heights.
It is also advisable to take into account the thickness of the partition where it is going to be embedded: a built-in shower niche needs sufficient depth in the wall to accommodate the entire box without it protruding or being less deep than expected. In plasterboard partitions with profiles, the gap between studs usually determines both the width and depth available, so it is good practice to confirm this measurement with the installer before ordering the model.
Finally, think about the placement height depending on who is using the shower: a shower niche located at chest or shoulder height is more comfortable for daily use than one placed very low or very high, and that reference height also enters into the calculation of how much wall space is available above and below.
| Model | Measures | Orientation | When is it appropriate |
|---|---|---|---|
| shower niche Atlantic | 33 × 33cm | Square | Limited wall openings or when two shower niches are installed at different heights |
| shower niche Pacific | 63 × 33cm | Horizontal (wide rectangle) | Large wall panels, to distribute cans next to each other |
| shower niche Arctic | 33×63cm | Vertical (high rectangular) | Narrow walls where it is interesting to take advantage of the height and stack boats |
| shower niche Indica LED | 33 × 33cm | Square, with integrated LED lighting | When, in addition to storage, you are looking for a point of light or a decorative effect in the shower |
Horizontal or vertical: choosing an orientation
Once you know how much wall space you have, the orientation of the shower niche almost decides itself. If the available space is wider than it is tall—for example, a strip of wall between the shower enclosure and the corner that does not reach the ceiling—a horizontal shower niche like the Pacific makes better use of that space and allows several canisters to be placed in a row, visible at a glance without having to stack them.
If, on the other hand, the available space is narrow but you have a vertical path - a strip of wall between two fixed elements, such as the taps and the corner of the shower -, a vertical shower niche like the Artic allows you to gain storage capacity without needing more wall width, by stacking gels and shampoos in height.
And when the available space is limited in both directions, or you prefer to distribute the storage in two different points of the shower - for example, one at the height of adults and another lower with children in mind - the square 33 × 33 cm option, such as the Atlantic or the Indic LED, is the one that offers the most flexibility in placement because it fits in both a wide and a tall space.
Indicative calculation based on the front measurements indicated on the product sheet (width × height). Does not include the bottom of the hole.
Perimeter frame finishes
The visible frame of the shower niche – the profile that is flush with the tiling, framing the gap – is chosen in the same finish as the rest of the taps and shower accessories, so that the wall has a coherent visual reading. The Atlantic, Pacific, Artic and Indic LED shower niches are available in Black Gun Metal, Matt White, matt black, brushed nickel, brushed gold and brushed rose gold, the same finishes that you will find in the shower columns, taps and accessories in the catalogue.
This allows you to plan the shower as a whole: if the taps are in matt black, the frame of the shower niche in the same tone prevents it from standing out as a separate element; If you are looking for a more marked contrast, a frame in brushed gold or brushed nickel on tiling in neutral tones can work as a decorative detail. In any case, it is advisable to decide on the finish of the frame at the same time as the rest of the taps, because both orders are usually made in the same phase of the project.
Shower niches with integrated LED lighting
The Indic LED shower niche adds LED lighting integrated into the niche itself to the storage function, designed to provide a point of indirect light inside the shower in addition to storing the cans. It is an option to consider when the project already includes decorative lighting in the bathroom, or when you want to give a more careful finish to a shower with little natural light.
As it is an electrical element embedded in a wet area, its installation must also be coordinated in the construction phase, along with the rest of the bathroom wiring, and it is up to the installer to verify that the connection meets the electrical safety requirements required in shower areas before closing the tiling.
Quick tab
- What it is: niche built into the shower wall to store gels and accessories, without shelves or hanging baskets
- When to install: during the construction phase, before tiling, the same as the recessed taps
- Available measurements: 33×33 cm (square), 63×33 cm (horizontal), 33×63 cm (vertical)
- With lighting: Indic LED model, 33x33 cm with integrated LED
- Frame finishes: Black Gun Metal, Matt White, matt black, brushed nickel, brushed gold, brushed rose gold
- Installation requirement: correct waterproofing of the gap before tiling
How we created this guide
Content prepared from the technical data sheets and products of the range of shower niches in the NOLUXA catalogue, the usual installation recommendations in the construction phase provided by manufacturers for built-in elements in wet areas, and NOLUXA's customer service experience with clients in the process of bathroom renovation. No own laboratory tests have been carried out.
Find the shower niche for your shower
Square, horizontal, vertical measurements and with integrated LED, in six finishes to match your taps.
See nichesSources and references
- technical and product data sheets for the range of shower niches, NOLUXA catalogue.
- Installation instructions for built-in elements in wet areas from manufacturers distributed by NOLUXA (IMEX, GME).
- NOLUXA Return Policy .
- Contact NOLUXA if you have questions about measurements before ordering your niche shower.


